Thursday, January 9, 2014

Caves, Mines, a Spring and a Frost Flower


I mentioned in an earlier blog that caves are often found near springs. The spring above is an obvious example, although the cave at the spring gets too low to crawl through about thirty feet back.  luckily, an entrance to a larger portion of the cave is just uphill a bit.


The larger entrance is immediately below the rock outcrop in the bottom left of the picture above, about halfway between the spring and the bluff behind it.  A stream that feeds the spring runs along the floor of the cave, and it’s accessible for about 500 feet of the cave’s length as it wanders beneath the bluff. Its temperature runs between 53 and 57 degrees, coolest in spring and warmest in fall.


The pictures above are of the pond and picnic area below the spring. The milky blue water is from very fine particles in that appear after rains and cause blue light to scatter, the same way the sky gets its blue color. Mountain streams in this area seldom turn brown after rains: they turn blue, instead.

If water stands a week or two, a thin layer of red clay settles out.  Up to four feet of clay covers the cave floor in some areas, and the stream cuts through clay channels here and there.  In other areas, the stream forms small clear pools that extend back under the cave walls. Making waves on them produces eerie splashing sounds from water hitting unseen shores far back under the walls. We saw a snapping turtle stick its 3-inch wide ivory head out from under the cave wall to look at us briefly, then disappear back under the wall. We also observed several nearly black frogs and a number of almost transparent crayfish as well as many bats, a spotted orange cave salamander, and the usual cave crickets.


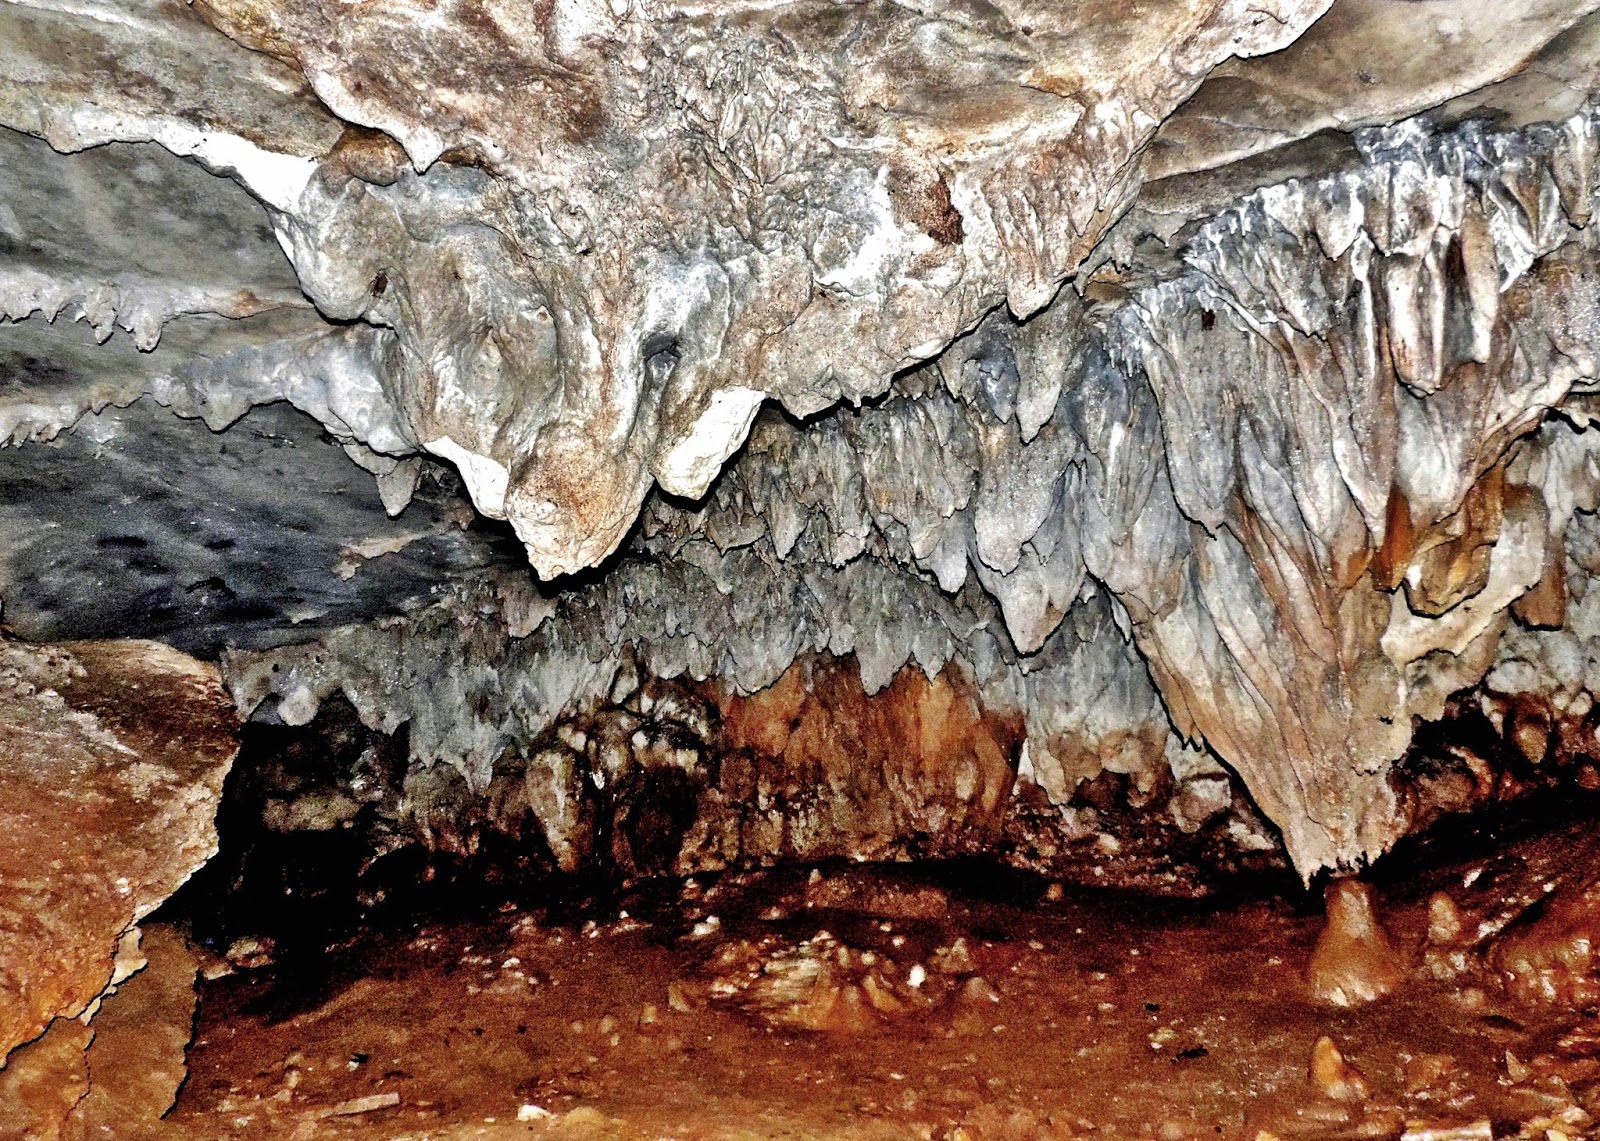
The first picture above is of formations in this cave and the second shows a portion of the stream extending beneath the cave wall.  Rocks in the foreground of the second photo may have tumbled down the steep entry when prospectors blasted at the cave mouth looking for mineral veins a century ago.  

The stream doesn’t have much slope – perhaps one foot in fifty to a hundred feet of run – so it moves very slowly in dry weather.  The only place there’s noticeable flow is in areas that water passes over gravel bars here and there.  The stream flows much more rapidly after rains, and gravel in the upper portion of the pond below the spring appears to have washed from the cave.


The property owner gave us permission to look for other caves, and we came across the opening shown above.  Rather than a cave, though, it seems to be an old prospect drift that goes in only about twenty feet, then ends when it reaches loose shale that collapsed into the tunnel.

Nearby, we found the rock pictured below that we think is botryoidal Smithsonite ore. The little grape-like clusters are a characteristic of the ore, and the surrounding material has a pretty opalescent quality that also is described for the mineral.


 A bit later, we found a second large cave about a quarter mile from the spring.


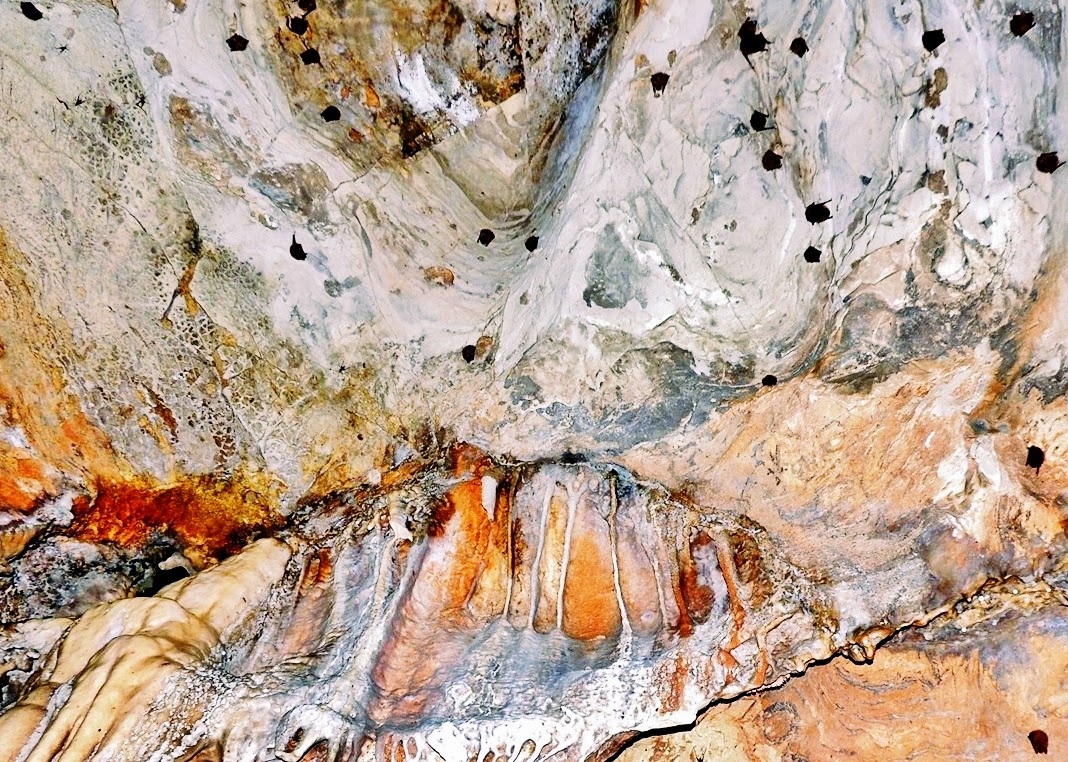
The dark splotches in the picture above are bats. I also photographed the wall flow at the bottom of the photo above, first using only the panel of LED’s we use for general lighting, and then again with the camera’s xenon flash.  I’ve found the results very interesting:

 LED    
           Xenon Flash
 
The photo using only LED light is not as sharp due to the lower intensity and oblique lighting, but the big difference is that light from the xenon flash penetrates through the bluish-white flow material to show the base material underneath. If you want to see through cave surface material, the xenon flash is what you want.  For surface texture, the LED at an oblique angle is excellent.

We got to this chamber by descending about ten feet down a nearly vertical entry to a bridge of debris that provides something of a floor. There, we found sinkhole-like vertical passages that continue downward at its east and west sides. We climbed down the eastern passage another fifteen feet to the chamber shown above. It seemed to be an isolated chamber with no passageway other than the way we came in. But there’s a gap along one wall where the cavern floor is raised by stubby stalagmites close to the wall, then drops to give about a two-foot opening shown in the picture below:


It was a tight squeeze, but we wormed our way through this gap and another twenty feet before the overhead rises to where we could get up on our knees for another twenty feet or so. The ceiling continued to rise to stand-up height, then stopped at a wall with a v-shaped gap about seven feet up (see photo below) that serves for passage to a higher. The gap is a flow path for water from a pool that must contain a very high mineral concentration because the hole and rock below is coated with sparkling white crystals.
I should have taken an LED-only photo to show the pure white color and sparkles. The flash picture below is a bit disappointing because the underlying stone shows through like a yellow-brown stain. The crystal layer provides only a subtle blue coloration:


The floor and walls around the pool in the upper cavern have the same white crystal coating in a band below the level that would allow water to drain. The photo below shows the white color better than the one above. The pool surface is at the bottom of the white band and the pool chamber has very steep sides – similar to a sinkhole.


Looking down from above, we saw a figure that looks like a seahorse. Its white color is from the crystal coating. Ripples on the pool surface below it are caused by water dripping from above.  The ceiling of the area over the pool isn’t visible from there, but some pictures looking up from the lower level suggest there may be yet another passage at a higher level.


The composition of this photo stinks, but it’s an interesting view of the same pool and seahorse components at a lower angle. Colors are strange.  I had to reduce saturation to tone it down, and it’s still pretty gaudy. The white crystal band with base rock showing through begins in the bottom left corner of the photo and leads to the pool where a long tongue-like drapery is hanging down to the top of the water – that’s the seahorse “head” in the picture above this one.  The smaller white figure to its right, with streaks of blue near the top (possibly crystal reflections), is the seahorse “body” seen in the earlier picture. The olive green on the flow at center is a color I haven’t seen in caves before.

A larger chamber, about fifty feet across and thirty feet tall, is adjacent to the pool.  A formation that looks like the neck and shoulders of a young deer partially blocks a sunken chamber on its far side. In the center of the photo below, the deer is looking back into the dark sunken chamber. The floor in the dark area drops abruptly, walls lose their smooth texture, and rocks there are jagged and increasingly iron-ore red. The cave widens again there, and there are large cavities in the walls that may be passageways.


Stone on the floor in the foreground of this photo seems scraped and broken as if mining had taken place here. Mining could account for the change in characteristics of the rock in the sunken area, as well. It’s hard to believe they would have taken ore out the way we came in, though.  If it was mined, there must have been another way out.


The photo above shows more of the ceiling above the deer sculpture.  Alternating light and dark layers of rock on the ceiling are typical for the entire cave. It reminds me of laminated wood. The photo also shows a lot of rock folding (rock layers at very top right and curved rock layer with the white sheer face at mid-left, for example). The bats hanging there seem oblivious to their surroundings, and their presence adds weight to the idea of another entrance – they prefer passages that don’t force them near the ground like the one we took, where predators might lie in wait.

We went back out without exploring beyond the deer sculpture.  It was very foggy back there, and bats were coated with droplets of condensation. So was my camera lens. The owner hadn’t known about this cave, so didn’t know what was there, either. But we’re invited back to find out.
 
later in the year, I found this frost flower in the picnic area below the spring. It’s made of ice ribbons that grow from water released by the stems of dead vegetation under rare conditions of temperature, saturated still air and just the right level of soil moisture. The deep hollow where the spring and pond lie creates still air at night. The cave and spring provide everything else that’s needed for the flowers to grow before the sun rises on frosty mornings.


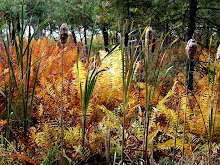
You’ll do best hunting frost flowers right at dawn: a few minutes in the morning sun is all it takes for them to disappear.
 
Take care,

Tally


Sunday, September 15, 2013

Cabin at the Cave


Cabin from Below

The cabin is sited against large rocks that are part of a limestone outcrop.  Fifty feet below the cabin is a cave opening that leads to a continuously flowing underground spring with a waterfall and twenty-foot diameter pool. The site was selected for the water and geothermal cooling potential our cave offered, but it was a compromise location.  A location below the cave would have allowed natural flow of water and cold air down to the cabin, but the 70-degree slope down there was more of a challenge than we wanted.

Cabin Site

The building was constructed to be a workshop and portable sawmill shelter with a wood-heated loft for warmth on cold days and sleeping during intervals of sawmill use and home construction.  Lumber from the mill would be used to build a small home adjacent to the workshop.  The home would use geothermal heating and cooling from the cave, pending proof of concept work at the workshop. Because it looks pretty cool, friends and neighbors refer to the workshop as a cabin, and we’ve pretty much adopted that term for its description.

Cave air and water in our area averages 60 degrees on an annual basis, but with the main cavern roof only ten feet below the surface, the cave should have a peak temperature around 70 degrees six months after the summer temperature peak (July-August), and a minimum temperature around 50 degrees six months after the lowest temperature (January-February). We've confirmed that temperatures vary in this general range, but we make only infrequent entries to not disturb the bats any more than necessary, so we have very limited data. Our measurements also show the floor to be much cooler than the top of the cavern thirty feet above during cold weather, due to cold air coming down from the entry about 15 feet above floor level.

Water condenses in the cave during the summer (it drips continuously in there) to provide dehumidified air when needed for cooling, and it adds moisture in the winter when air in the cabin would be dry. Deeper caves in our area stay much closer to the annual average 60 degrees the year around and don't vary much from the average, compared to our twenty degree range.
In the picture below, the cave mouth is just out of sight below the bottom point of the triangular rock that’s directly in line with the cabin in this photo. The rock (a triangle with twelve foot sides and two to three feet thick) appears to be in position to slide down over the cave entry at the slightest provocation, but probably would require an earthquake.

Cave Location - At Point of Rock Below Cabin
Despite the fact that the cabin site is on a 30-degree slope, we were able to build a winding ATV trail to it that maintains a reasonable 12% grade.   When we began leveling the site, we found that the outcrop behind the cabin began to slope forward once we got about three feet down.  We had to build up the lower foundation a couple feet higher than planned, but it worked out OK.  Keeping the back of the cabin up close to the rocks provides a convenient way to access both the cabin roof and the loft – it’s only a step across.


ATV Trail to Site
 
The soil we dug out below the outcrop was screened to provide gravel for drainage beneath the floor and soil to build up a terrace below the cabin for a walkway.  We were a bit short of gravel, but found a good gravel bank while hand-digging the ATV trail, so we were able to utilize that.
Our design gives us an 8 by 12-foot sleeping loft with a wood stove for heat in the coldest weather and a fully open 12 by 16-foot lower level.  The loft is accessed by a wooden ladder and has a south-facing 3.5 by 5.5-foot double pane window for light and winter solar gain. We’ve hinged the window at the top side to open for ventilation.  Two windows the same size are mounted in the south wall of the lower level, but they are fixed in place.

The perpendicular roofs allow space at the high edge of the lower roof for ladder access to the loft area.  Both roofs have 3/12 slope and are fiber cement over plywood, sealed with acrylic elastomer.  Siding also is fiber cement for its fire-resistant properties. The lower side of the loft is five feet high and the high side is seven.  The lower level has a rear wall of eight feet and the front wall is eleven feet high. Ceiling below the loft is seven feet high, but the other half has a full cathedral ceiling.


Cabin Telephoto from Opposite Hillside
If we were to do it over again, we’d make both levels a foot higher: upstairs for added head room and downstairs for easier loft access (Our entry via ladder is only three and a half feet high). There is to be a full-sized door into the loft from outside: its floor is at the same level as the top of the outcrop it is built against. During construction, the wall there was not closed until the roof was finished and building materials came straight in off the rock. 
The main door is five feet wide by eight feet tall, designed that large to allow room for our portable sawmill to be housed inside with the rails extending outside. However, after three break-ins, we nixed the idea of keeping any expensive equipment there.  We like the large door for the light it provides when it’s open, though. Screens are not necessary here.  The bat population in the cave keeps flying insects at a very low level.

Cabin from Above

The outer door to the loft, additional siding and inside finish work were put on hold after the third break-in. We were kept busy making repairs, beefing up the door by sheathing it with cement backer-board and hardening up other vulnerable areas. Soon after the third break-in, ice storm damage to trees closed off road access to the cabin. We’ve had no more break-ins, but the only access was by foot until we finally cleared the access road this spring.
Efficient use of the cave’s waterfall for the water wheel is complicated by the water being spread over a wide area as it falls from the rounded edge of the rock from twenty feet above.  

Water falling from Above
We really need to access the water source to be able to utilize the water to power our water wheel.  Once there, it might be possible to install a pipe to collect water.   Hopefully, the twenty feet of head we’d have for the water wheel would let us move both air and water with it. Unfortunately, the slimy wet concave surface that leads to the water shelf is far beyond our climbing skills, and we’ve been unable to get a ladder in there that’s long enough to access the area in a safe manner.

We've discarded the idea of a funnel system because although minimum flow is only about one gallon per minute, after a hard rain, we've observed twenty or thirty gallons a minute.  It really roars! A normal flow of a couple gallons a minute can be seen against the black shadow on the photo’s left side near the top, just as it begins to fall from the curved edge of the rock at top center.  The next photo shows splashes in the pool below over about a two-foot circle.
 
Water Hitting Pool Surface

Below is a wide angle (thus distorted) shot from across the cavern toward the waterfall source, seen here as stone coated dark black on its wet upper surface. We suspect the black coating may be lead sulfide – water in this area is high in lead, so we use a purification filter designed to remove lead for our drinking water. Above the black rock it looks like six or so feet to the ceiling, and a passage may extend to the left.  The ceiling, as best we can determine without sophisticated survey equipment, is directly underneath the cabin.  As high as the ceiling is, our calculations suggest there’s roughly ten feet of solid rock between the cabin floor and the cavern.

Falls Source Area - 20 Feet Up

Our break-ins have pretty well eliminated the idea of a home there, but we still hope to complete the cabin and fully test our ability to deliver 50-degree air to cool in summer and warm it with 70 degree air in winter, as well as pump water by means other than an electric pump. We may even convert the cabin into mini-home someday.  We’ll get to the water source somehow.
 
Best wishes,    
 Tally

Sunday, November 25, 2012

Update on House in the Woods


As of the fall in 2012, the next two pictures show how things have progressed:

A whisp of smoke rises above the roof from the wood stove on this nippy fall morning.

West side of house: same angle as below for comparison to 2007
It started out like this in the spring of 2007:

Spring, 2007.
 

Th power company hooked up electricity as soon as a wall was up to provide support for a meter box and the wires from their pole. It was pretty much like a tent back then, with just a temporary roof with tarp over it. 

                                                                                            Tally

Friday, May 25, 2012

House in The Woods


The house in the woods isn't quite as wooded any more.  Tarps are finally off the roof, and there is a lawn of sorts.  There's even a second floor deck, although it's not finished in this photo.  Well, nothing is finished, really, except the roof.  I'm hoping the sheathing doesn't rot away before siding goes on, but first there's stuff like insulation and sheetrock to get installed now that it's staying dry inside, at least.

The patchwork colors are due to prepainting the latest wall additions to help preserve the OSB long enough to get the sheathing on.  The remainder will get painted shortly by use of a very long-handled paint roller.  Another deck goes across the back later on, so that will make the sheathing job easier.

This is how it looked before, photographed from about the same angle, but a lot closer since there wasn't anything to see but woods if you tried taking a picture farther away: 


The posts now support an 8 by 28-foot addition to the upstairs and a 4 by 16-foot addition to the first floor. The picture below is how it looked early on from the front.  It's pretty well closed up with real wood and shingles now, but still some openings for insects and bats to get in.  The bats keep pretty good control of the bugs. 


Tree clearing was required because the ice storm two years ago bent many of the trees in the direction of the house. One tree had tipped over onto the roof, and others appeared ready to do the same.  The nicest trees that weren't a hazard were retained, but they were thinned out enough that it took the birds a full season to become accustomed to the arraingement.  Now they are back in full force: indego buntings, cardinals, woodpeckers (the wholeset - downy, hairy, redhead and piliated), hummingbirds, flycatchers and wild turkeys to name a few.

Tarps don't make good roofs.  However, real roofs need good walls under them, and an attic floor needs to be installed after the walls are up to provide a platform for working with heavy rafters without having to balance them from a ladder. And putting the walls up mean windows and doors have to be installed inside as the walls are built to avoid working outside on a ladder later on. It's a lot of work for one person. Next time, if there is one, I'll put up a great big barn of a shell with a roof on it first with only posts holding it up, then add walls.  I've built barns like that.  Don't know why I too dumb to do it with this house.

Tally

Monday, December 12, 2011

Satellites and Flowers


This modified satellite image shows the area with the stone walls and rock outcrops that I pictured a couple blogs ago.  I used PhotoScape to convert a Google Earth in 3-D image into a negative black-and-white image to simulate snow, then added a horizontal fadeout at the top to give a bright sky effect (otherwise, the sky is totally black in the negative mode).  Our driveway along the base of the mountain is the squiggly line going up the middle.  The mountain to the left is forest and the lower land to the right is brushy meadow.

The driveway is about 3500 feet long and climbs 450 feet of elevation. Seven old logging trails branch off to the left from the main drive at 200 to 500-ft intervals. The mountainside averages nearly 45 degrees of slope, but the lateral trails snake along nearly flat terraces atop the rock bluffs.  A few intervals of rock bluff show as short horizontal black lines in the image, but most of the bluffs are well hidden by trees that are 80 to 100 feet tall.

The logging trails peter out wherever the terraces narrow down too much to provide flat ground for trail-building.  The timber is noticeably older in the steep areas where trails are absent. Lumber from trees such as that exhibit high strength and wear resistance when used for floors, countertops and the like due to the trees’ slower growth rate and more closely spaced growth rings.  The wood also has higher density, and that means higher BTU content in firewood. But except for windfalls and culls that can be snaked out with cable, our old growth timber will stay as is.


This and the following picture are of Eastern Wahoo, or Strawberry Bush berries.  Deer and birds love the berry, so it’s difficult to find them still hanging on the bush.  Each lobe of the berry contains a single large, bright red seed the size of a peppercorn.  The first picture is from above, looking down at the top of the fruit.


From below, you can see how the red seeds peek through as the berry matures.  Eastern Wahoo is a native bush that grows up to 10 feet tall (the ones I’ve found are half that size). It has a small purple flower that is easy to miss, and it grows in deep woods from New England to Wisconsin and south to Texas.  Despite the fact that I’ve spent much time in the forests over much of the Wahoo range, this is the first year I’ve come across the plant.  I took these pictures near Music Creek in the Arkansas Ozarks early this November.
Propagation of the Wahoo plant is supposed to be as simple as placing a small branch in a glass of water where it will grow roots in about a week: the same way you root willow twigs.  It’s a pretty and very unique berry.  I plan to propagate some to plant in shady areas around the house next year, but a caution – I’ve read that both the leaves and berries are mildly toxic to humans.
I missed catching it in bloom, but the picture here is a portion of a 7-foot tall compass plant stalk about half way up that shows the hairy inch-diameter stalk, the strange leaves and seed heads present just after the first frost. Click to enlarge the picture - It looks better that way!  I hope to photograph the flowers the next time I visit the area.
I found it in a small clearing in the woods.  The name comes from the plant’s habit of growing its fan of basal leaves to face the sun’s path from east to west so that the edges of the fan face north and south. A stalk as tall as a garden sunflower shoots up from the basal leaves and yellow flowers the size of teacups grow on short branches off the stalk and at its top.  When I found the plants, I assumed they were some sort of sunflower, but the flower book says they are actually members of the aster family, with seeds at the periphery of the seed heads rather than across the flat center as in the sunflower.
The compass plant’s leaves are one to two feet long, and have the shape of a buck’s antlers in early velvet.  It’s so strikingly different than anything else that I’m certain I’ve not encountered it before.  It’s a prairie flower, though, not expected in wooded areas.  I wonder what bird carried the seeds from the Kansas prairie and dropped them in this little clearing?  
                                                                                                     Merry Christmas!
                                                                                                                             Tally


Tuesday, November 30, 2010

Linear Tipi


Linear Tipi shelters


These are classified as frame tents, as are yerts, Viking tents, Tipis and Wigwams, but  the style I’m describing here is a bit different. I’m sure it’s not unique. But I think it's an interesting combination of the traditional Tipi with a modern A-frame. I’ll describe it and how I’ve built them for anyone interested.

1) Cut poles to uniform length, straight as possible and trim smooth. Cedar and larch are best for low weight and rot resistance, but if you can handle heavier poles, hop hornbeam (ironwood), ash, burr oak, locust or other trees used for fence posts in your area would be fine.

2) Lay two poles down on the ground in a “V” configuration with their butt ends where the shelter will begin. Pictures show 16-foot cedar poles with a base of 16 feet. Cedar doesn’t need peeling, but other woods may.

3) Attach a cross-piece at a vertical height of 7 feet above a line from one butt end to the other (ground level) to make an “A” configuration.

4) Attach short pre-cut cross-pieces of equal lengths at the top of the “A” to connect the tops.  Pictures show my pre-built caps, but he cap device is optional:  cross-pieces that extend about an inch above the top of the poles and cut to the same slope as the poles at the edges will work fine. The top cross-pieces provide a place to fasten a flat ridgeboard or pole.

5) If you have enough open area, set up as many more “A” frame members as you want for the shelter’s length. I spaced them at 4-foot intervals for a 28-foot length. Two- and four-foot spacings are handy in case you want to add sheathing for rigidity or strength near the ground for snow accumulation in northern climates, etc. I did that later.

6) Raise the “A” upright either manually or with a pulley system or come-along attached to a tree in line with the shelter.

7) Secure this first frame member in a vertical position (ropes to trees and post holes in the ground here) and continue with the rest. Boards or poles, pre-marked at the spacing distance you’ve chosen (4-ft here) should be nailed from cross-piece to cross-piece and leg to leg each time a new frame member is added to hold everything secure.

8) Frame members also can be raised with a foundation or wall as a base. The cross-members act as collar beams to limit outward force and make the structure stable wherever it's placed.  Without the collars at mid-point or lower, a wall would be forced outward. With a wall, the roof members may be shortened and the collar lowered to retain loft space. 

9) Add the top ridge board or pole after you’ve made sure all is level and everything's in line.

10) Toss ropes (I use baler twine weighted with sticks for weight) over the ridge board at tarp grommet intervals, fasten to tarp and pull a tarp up. When a tarp approaches the top, push it with poles from the ground or a ladder to help it get over the ridge board without tearing. Then do the same for the other side. Make sure they are lapped. If the shelter is not as tall as this one, one tarp may cover the whole thing.
11) Here, the first of two lapped blue tarps is up.  After the second was in place, both were covered  by a single heavy-duty silver tarp. It's still in good shape 12 years later.  Poly tarps will last many years shaded by evergreens like this.  In direct sun, use canvas or paint the tarp after it weathers for about a month. I’ve painted tarps light colors and had them last four times as long as unpainted ones.

12) Add a floor supported by the cross-members, and you’ve got a loft. The loft I made for this is 6 feet to the peak.

13) Now line the inside of the poles with tarp or canvas. The loft floor makes a ceiling to keep heat from rising to the peak when you need it in the winter.  Blue tarp works fine here. Even when below zero outside with a wood stove for heat inside of smaller versions of this that I camp in, the inner tarp never collects condensation and is warmer to the touch than a double-pane window. As with a traditional Tipi or yert, straw, grass or fresh dry leaves can be inserted to give even more insulation.


14) This last photo is one of the smaller shelters I camp in.  It's built on 4-ft walls with a 12-ft  frame on top. This also has a 6-ft loft. The window is half a glass patio door mounted lengthwise in the end-wall.

Have fun!
Tally

Saturday, June 12, 2010

Rocks and Ingenuity

Rock


Rock is pretty basic stuff. It’s the firm part of terra firma, certainly. Where would we be without that?

I’m sort of a nut about rock – Not whole mountains like the Alps or Rockies, but the moderate sizes I find in hidden outcrops and boulders strewn around by glaciers, earthquakes and such.


I was in New York State last month – the part they call the Southern Tier. Found some nice rocks where natives may have camped along the Susquehanna River centuries ago. Also found several stone fences in the forest where early settlers placed stone from their fields.


It was surprising to find large amounts of flat stone peeling from some of the boulders that no one had used for building. When you consider what you’d pay for stone like that at a stone yard, it’s amazing that it hadn’t been used or sold. They call it Bluestone or Graystone there, depending on the color. It’s so abundant in the region, nobody thinks much about it.


There’s oil and gas in the Marcellus Shale there too, but that’s not being utilized, either. Makes you wonder about what they once called Yankee ingenuity. I guess a few of the environmental nuts have good intensions, but my own thought is that true ingenuity (as opposed to corporate greed for quick profits) is all that’s required for safe resource production and utilization.


To me, ingenuity means getting things done with a combination of smarts and lots of experience to determine the proper way to do things safely. Personally, I think any corporate manager or bureaucrat that doesn’t have hands-on experience in the matters he makes decisions on ought to be thrown in jail and left there. I’d rather pay for his keep there than the cost of his errors. British Petroleum management and Mr. Obama, please take note.

Tally